Tuesday, October 11, 2011

CROCKPOT BARBECUE CHICKEN


Three words: Sweet.  Baby.  Ray's.  It all began when I saw it mentioned in a video on YouTube that my friend Chris shared with me (viewer discretion advised) and I bought it just for kicks and kind of as a joke.  But when I tried it...aw, yeaaah.  Before, I had thought all barbecue sauce tasted the same.  Post-Ray's, I know better.

Now I'm sad to say that the BBQ recipe I used it in originally went MIA and I had to make due with another I found.  Also, the chicken I used was frozen --for awhile--which is probably why it turned out a little dry and why I went for take two, which was boooomb.  So, below, I give you two incarnations of the same recipe for whatever form of chickie you'd like to use.


INGREDIENTS:
40 oz. frozen boneless skinless chicken breast tenders (or 4-6 fresh boneless, skinless chicken breasts)
1 bottle Sweet Baby Ray's Barbecue Sauce
1/4 c. vinegar
1 tsp. red pepper flakes
1/4 c. brown sugar
1/2 tsp. garlic powder

DIRECTIONS:
1. Mix together all ingredients except chicken.


2. Pour sauce mix over chicken and toss to coat (if using frozen chicken, no need to defrost it; just pop it in there.)


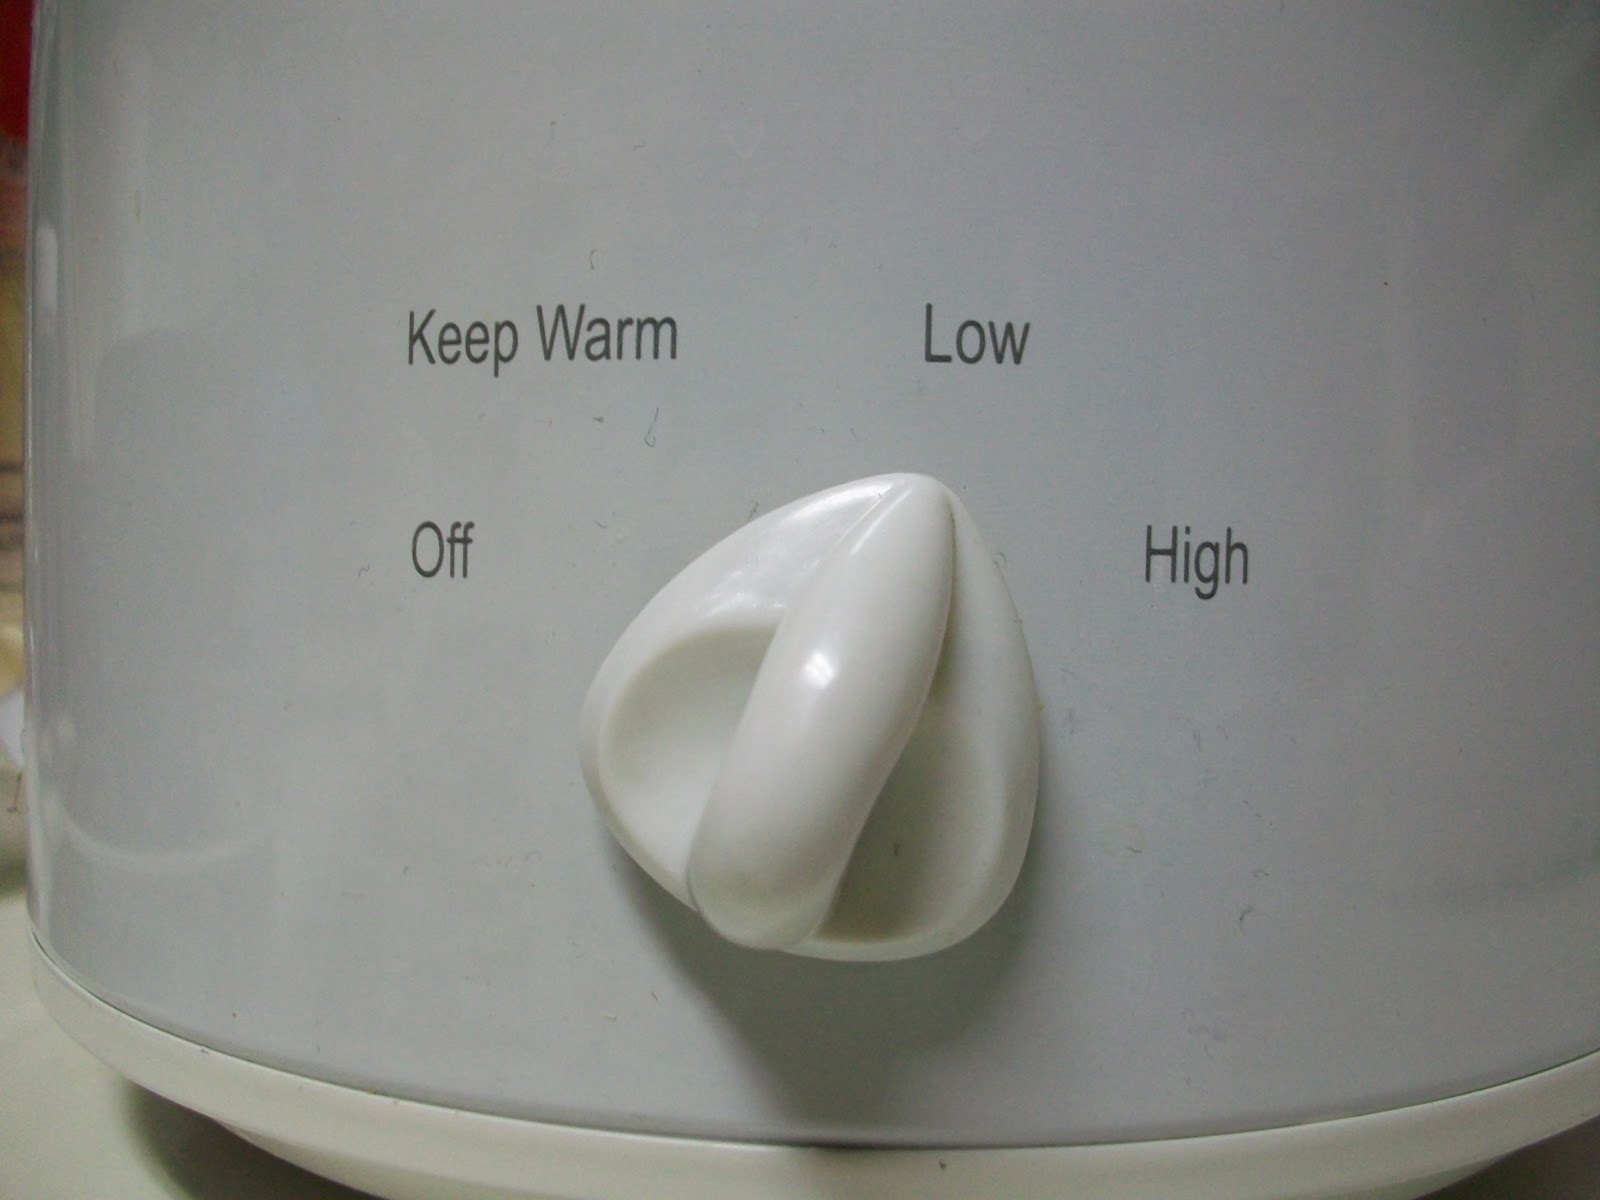
3. Empty chicken and sauce into crockpot and cook on low for 4-6 hours.


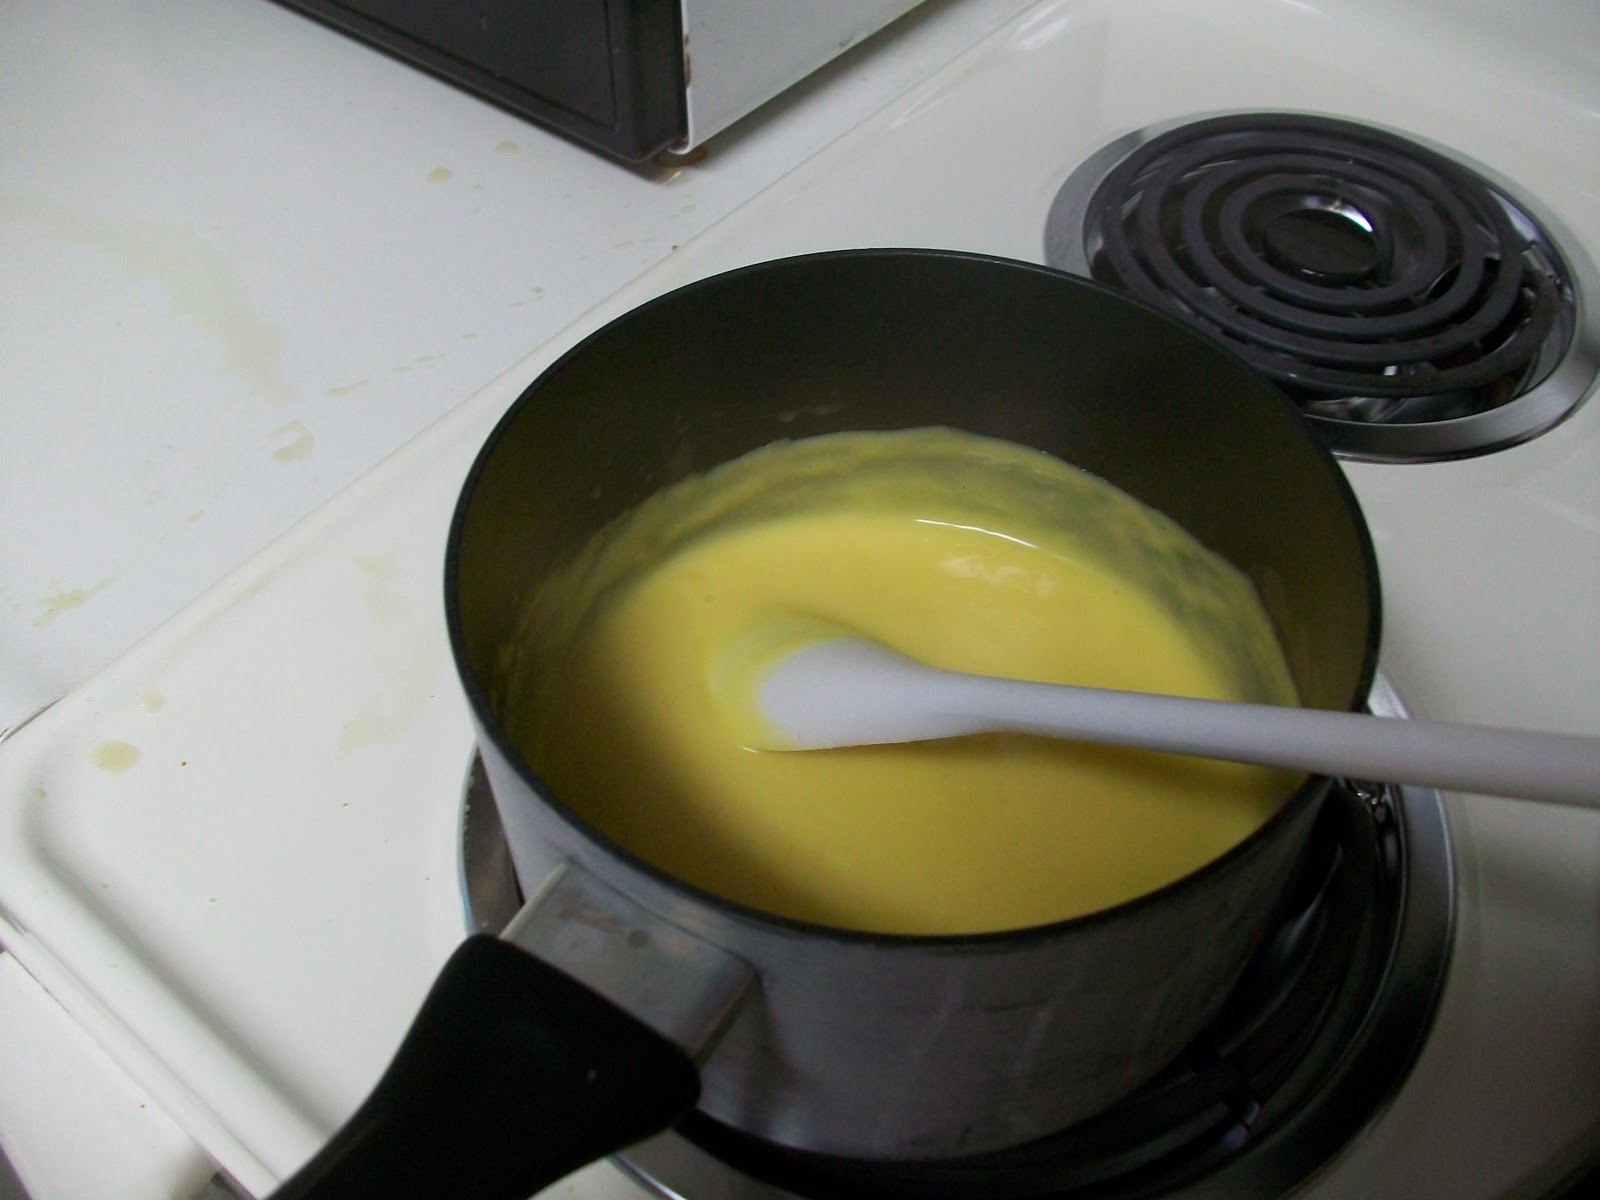
Sadly, my chicken ended up really dry and all I could think was "What a waste of great sauce!"  because it didn't really stick to the chicken.  My solution (which, by the way, worked like a dream):
4. Use two forks to shred the chicken and allow it to sit in the sauce for 10 minutes.


Crisis averted.  I was so sad things didn't work out on the first try but was happy as a pig in a poke when I found out that not only had I fixed my flub, but had made it A-worthy.  For those of you who thought you would never use math or science past the 12th grade, here's the skinny: shredding equals more surface area which equals more area for the chickee-doos to soak up all the goodness.

And since I needed something to go with it (shredded chicken looks so sad all alone), I conjured up some side dishes, which you'll see soon.  Done and done.

Official Grade Before Shredding: B-
Official Grade After Shredding: A


Tuesday, September 27, 2011

BUTTERSCOTCH BREENIES


At this moment I'm going to ask for your trust.  And I guarantee it -- your faith will be tested.  :)  But seriously, you're not gonna believe the ingredients in my next concoction and on top of that, you won't believe how motherf***ing awesome it is until you've actually tried it.

Now here goes: This recipe...is for brownies.  These brownies...are made with beans.  That's right.  Beans.  Black beans to be exact.  (Get it -- breenie?  Bean...brownie...?)  And it only has two other ingredients, so you have no excuse not to try it.  Now, if you're saying "WTH, lady?  You really expect me to think brownies with beans don't taste like dog doo?"  Yes.  That's exactly what I'm expecting.  In fact, I'm expecting you to make this your new go-to brownie recipe.  Because if you trust me on this and follow it through, your mind will literally explode.  Still unconvinced?  Well then clearly you can't handle this much awesome.


INGREDIENTS:
1 box brownie mix
1/2 cup butterscotch chips
1 can black beans

DIRECTIONS:
1. Drain liquid from beans and return beans to can.  (I just cut two slits with the can opener and drained it.)  Fill can to the top with water.


2. Pour beans and water in a blender and pulverize the living crap out of it.  Try to eliminate any large pieces.  You should end up with a generally smooth mixture, although you'll still see specks of bean skin in it.  (Relax; it's not going to taste like beans.)


3. In a large bowl, combine bean mixture and brownie mix (I prefer Duncan Hines Dark Chocolate Brownie Mix).  Beat until smooth.


4. Fold in butterscotch chips.

5. Pour into baking dish or pan and bake according to directions on box.  Brownies are done when a fork inserted into the center comes out mostly clean.  These brownies are more on the fudgey side, so they won't be as firm in the center as your average cakey brownie.


And that's it!  No oil, no eggs, and you can store the only three ingredients in your cabinet on the long-term so when you've got a hankerin' for a dessert, everything's a-waitin' for ya.  Plus, if you shop at Target, you're droppin' five, maybe seven bucks max (It's all about the Hamiltons, baby), so you're not out much if you're up for a culinary adventure and don't like it.  And as my dad used to say, don't knock it 'til you've tried it.

Official Grade: A+

VEGGIE & CHEESE SOUP PASTA


Until now, I've only known Campbell's Cheddar Cheese Soup to be a broccoli covering.  (In case you've never done it, heat up a can without adding anything to it. Goes great on vegetables.)  So why not put it on vegetables on pasta, eh?  Turns out this was a pretty neat idea, especially if you need something filling in a hurry.


INGREDIENTS:
6 oz. egg noodles
1 can cheddar cheese soup
1/4 cup milk
1 package frozen brussels sprouts
1 package frozen asparagus
salt and pepper to taste

DIRECTIONS:
1. Cook noodles in salted water.  Drain and set aside.
2. Before opening bag, snap asparagus spears into 1-2 inch pieces.  You'll have to do this by feel, but it's better than trying to cut them once they're cooked.


If you do miss a few, though, just snip those suckers with some kitchen scissors....


3. Cook asparagus and brussels sprouts according to package directions.
4. Heat cheese soup and milk in a saucepan and mix until smooth.


5. Combine noodles, veggies, and cheese sauce.  Add salt and pepper to taste.


If I were to do this again, I'd boil the brussels sprouts instead of steaming them.  They're a great vegetable, but their bitter flavor is a little to much for me when steamed.  Also, you might consider broccoli, cauliflower, or green beans as alternatives if you don't like the veggies I used.  It's no gourmet, but this is a good I-need-something-quick meal.

In the future, I'd like to try another version with some parmesan, asiago, or fontina for a stronger cheese flavor, and I'd probably add some chunks of ham too.  Although I like mac and cheese, I don't like it greasy and I think meat and veggies jazz it up a bit.  If YOU have a great Mac & Cheese+ recipe, I'd love for you to share it below.  I heart cheese, so I'm ready for you to blow my mind.

Official Grade: B


NUTTY THAI NOODLES


Hmmmm....  Noodles, peanut butter.  Yup, that'll work.  Now, from the outset of this particular adventure, I'd never whipped up a peanut sauce before but I'd heard rumors that it could be made with the good ol' PB.  A bit of tippety tapping on the keyboard and a little surfing of el internet and it turned out I was right.  Now, I'm sure that my all my Asian friends' grandmothers would roll over in their graves if they heard this, but hey -- I've got peanut butter and they're not here to tell me no.  Hence, I give you Nutty Thai Noodles a la White Girl.


INGREDIENTS:
Peanut Sauce
1/2 cup peanut butter
1/2 cup hot water
1/4 cup soy sauce
3 tbsp brown sugar
3/8 tsp cayenne pepper
1/4 tsp ground ginger

Noodles
Peanut sauce (see below)
1 package thin rice sticks
1 package frozen green beans
1 package tofu
2 tbsp oil
ground peanuts (for garnish and awesomeness)
soy sauce

DIRECTIONS:
Peanut Sauce:
1. In a saucepan on low heat, combine peanut butter and water.  Make sure to add water gradually to avoid lumpy peanut butter soup.  Mix until smooth.

2. Stir in soy sauce, brown sugar, cayenne pepper, and ginger and blend to a smooth mixture.


Noodles:
1. Boil rice sticks in water or soak, covered, in the refrigerator overnight.  Drain and set aside.


2. Steam or boil green beans and add to noodles.

3. Drain tofu and cut into cubes. Press.  If you've never pressed tofu, you can learn how to do it here or you can get lazy like I did and press it between two plates and paper towels multiple times until most of the water is out.


4. Fry tofu in oil until browned a bit.  Remove from heat and add to noodles and green beans.


5. Add peanut sauce and mix thoroughly.  Add additional soy sauce and ground peanuts to taste just before serving.


Other than the fact that the green beans were undercooked (yeeaaah...shoulda checked that before I mixed them into the noodles....), this was pretty delicious.  If you want to eat it with just the peanut sauce alone, I'd double the recipe; otherwise, just add soy sauce when you serve it.  I also recommend lots of ground peanuts, which give a nice texture and good flavor, plus this is my claim to actual culinary legitimacy -- I learned to add ground peanuts to noodles from an actual Thai chef when I did a project in high school.

Bottom line: Sure, you have to make a sauce but the rest is pretty simple.  I couldn't wait to get home to eat this every night, so that's probably a good sign.  Only because I botched the green beans:

Official Grade: A-

Saturday, September 17, 2011

EASY CROCKPOT CHILI


You know those weeks when you can just barely get through the day without 500 people wanting something from you?  Those weeks when you barely get enough sleep to make sentences -- even with the aid of Starbucks -- and you'd could call in sick if only your absence didn't cause more work for you?  You know, the weeks where a trip to the grocery store is completely out of the question and making a hot meal is like ripping out your very own soul?

Have no fear -- Crockpot Chili is here!  This is one of those meals I keep going back to, not just because it's as easy as updating your Facebook status, not just because it's delicious, but because you can buy the ingredients pretty far in advance in anticipation of just such a circumstance.  The only things that are perishable in this recipe are ground beef (freeze it!) and an onion, which lasts a pretty long darn time.  All the rest are canned and before you chastise me for making a meal from canned foods, 1) actually try it and 2) take note of the venti latte to which you are so dearly clinging.  Nuff said?


INGREDIENTS:
1 lb lean ground beef or ground turkey
1 small onion, chopped
1 28oz can diced tomatoes, undrained
1 15oz can great northern beans, rinsed and drained
1 15oz can kidney beans, rinsed and drained
1 15oz can chili beans
1 8oz can tomato sauce
1 4oz can chopped green chilies
1-2 tbsp chili powder


DIRECTIONS:
1. Brown meat and cook onion through.  Drain and discard any fat.  Transfer to crockpot.


2. Add canned items and the chili powder (I prefer one tablespoon 'cause I'm a wuss) and cook on High for 6-8 hours or until done.  That's it!


I used beef this time, which I think is better, but I've used turkey before and it's also good.  In fact, this began as a recipe I got from Slow Cooker Recipes for All Occasions, which has some other great selections.  The original called for black beans and garbanzo beans, but I always thought the garbanzos never cooked right and one time I went to get all my beans, Target only had great northern beans, kidney beans, and chili beans.  An excellent accident!  I think the chili has been much improved upon.

I recommend serving with cheese (I love mozzarella; my family likes a Mexican blend) and/or sour cream.  Also note there is no added salt here, so if you want, add salt as needed.

Considering I make this all the time and it continues to be scrum-diddly-umptious AND considering I've made it for my aunt, uncle, and cousins and they annihilated it, I'm gonna say this passes with flying colors and extra credit.

Official Grade: A+


WHERE HAVE YOU BEEN?!

The beach off the Santa Monica pier
So here's the story.  No, I haven't been starving, but I did have a nice little month-long excursion to SoCal.  And when I got back I had to fall straight into the start of the school year and I've been planning my bootie-ootie off, morning 'til night, ever since.

But let's talk summer.  For those of you who know me well, you know I work on film crews in my spare time and I was faced with a stretch of vacation consisting of A) couch-surfing and a second round of Law & Order marathons or B) making a go at working on some excellent Hollywood flicks.  Hmmm...that was a hard one.

I strenuously object.  WTH are we doing
naming a freeway after this bastard?
So off I drove to stay with my aunt, uncle, and cousins for a month of prospective excitement and I can't say I was disappointed.  I met some really cool people, both famous and not, learned a TON, found out how to navigate LA, and toured some amazing places, all while beefing up my resume.  I'd call that a success.

A sculpture at the Getty Villa in Malibu
A lot of people have asked me why I didn't say anything about it until I came back.  Pretty simple, really: I didn't need to advertise all over the interwebz that my apartment was sitting empty for a month. It's like telling the whole world "Hey, you!  Please come rob me!"  Call me paranoid, but I didn't need to be worrying about that.  What a buzz kill that would be.

And now it's time for a bit of a confession, but not much of one.  I'd had every intention of bringing some boxed food with me, but I was literally two hours into my road trip before I realized I'd forgotten.  C'est la vie, eh?  I swear to you I didn't do it on purpose.  How can you be sure?  BECAUSE IF I'D BROUGHT ALL MY FOOD I COULD HAVE BOUGHT SOME FREAKIN' EGGS BY NOW.  I want eggs SOOO bad.

If I die young, bury me in satin,
lay me down on a bed of Jersey Mike's
But I digress.  What did I eat when I was down there?  Well, film sets feed pretty good and when you're on way home from a 13-hour day, you're not really interested in going home to cook, so the fast food kings (including my new obsession, Jersey Mike's) made a mint off my exhausted hunger.  Also, my aunt and uncle who were already kind enough to put me up were insistent that their house was my house and their food was my food.

Of course, I couldn't just let them cook for me without providing some sustenance in return, so here's where I admit to some cheating (but for a good cause).  I bought ingredients for one pan of lasagna and one pot of crockpot chili (which you'll see next; I made a pot for myself before I left for LA).  Additionally, a few boxes of granola bars (no telling what sets will have for snacks and it's best to have some on hand) and a carton of oats for oatmeal (the Cheerios weren't giving me enough energy for the long days).  And that's it.  That ALL I cheated on in a month, so I think I did pretty well.  

My friend Missy and I in Ventura
By the by, I'd like to mention why I don't have any set pictures up.  The lowdown: 1) it's not super cool to be taking pictures while there's work to be done, 2) sometimes it's not allowed, 3) sometimes you have to wait until the project is distributed to show any photos, 4) the set photos are on FB and I can't download them, or 5) I don't look good in them.  :)

So when all was said and done, I'd worked on three movies and a music video, went to the Getty Villa and the Getty Center, drove Malibu canyon (omg, never again), checked out Santa Monica, cruised around Hollywood, visited my friend Missy, saw some fireworks from a Chuck-E-Cheese parking lot, made a corndog commercial with my family, did some shopping, got lost, got found, had a ball, and in a nutshell, that was my summer.


Grauman's Chinese Theater, Hollywood
(The street was blocked off for the Phineas & Ferb premiere)

So, I will soon return to cooking and blogging, just as soon as I have a chance between lesson plans, sleep, and going to Starbucks.  In the mean time, I'd love to see some of YOUR recipes.  If you'd like to share a miracle you've created in the kitchen, give us the recipe and the rundown in the comments section below.

Until next time....


Sunday, August 7, 2011

APPLE CRANBERRY CRISP + YOUR 2ND CHALLENGE


It sounded like a good idea.  It really did.  At the beginning of this little escapade, my friend Sarah made an excellent suggestion for using all those cranberries and that mountain of granola: a delicious cranberry crisp.  "You mean a cobbler?"  I said.  "No, a crisp."

Ok, food dictionary time.  After a bit of searching the interwebz, I share my new knowledge with you.  Not everyone seems to agree on every term but here's the general idea:

Cobbler: A deep-dish fruit dessert with a fruit filling and a thick, usually biscuity crust on top.  The crust can be solid or can be spoon-dropped in pieces, which end up looking like cobblestones.

Crisp: Same deal, but with a more crumbly topping -- bread crumbs, cookie crumbs, graham cracker crumbs, or breakfast cereal (and that includes granola, yo).

Crumble: A crisp with a Union Jack flying over it.  (It's the same thing as a crisp, but British. God save the queen.)

Grunt: You know I had to throw this one in there.  It's so "That's what she said."  Basically, a grunt is a cobbler that's stewed instead of baked (most often in a cast iron skillet) and supposedly it makes a grunting noise when cooked, hence the name.  Also referred to in some parts as a slump, but that's so depressing.  Makes me think of a dead body on CSI, all slumped over and--

Oh, yes, back to the cooking.  Call it what you will, but since we're in the good ol' US of A, we're going to call it a crisp.


INGREDIENTS: 
6 cups fresh cranberries
1 giant apple and 1 small apple* (or 3 small apples)
1 cup cranberry juice
1/2 cup + 2 tbsp Splenda for Baking
7 tbsp white sugar
12 oz maple crunch granola

*For those of you keeping track (and if you're eyeing my list this closely, you have bigger problems), I got that other little apple as a side at Panera.


DIRECTIONS:
1. Preheat oven to 350F.
2. Cut apples into chunks about the size of 2-3 cranberries.


3. In a large bowl combine cranberries, apples, cranberry juice, Splenda, and sugar.  Pour into baking dish and pat down.


4. Cover with granola, patting down until firm.


5. Bake 55 to 60 minutes or until filling is bubbly.


To give credit where credit is due, I nabbed the original recipe from Oprah.com and went from there with what I had.

Eh.  I wouldn't call it bad, but I wouldn't call it good either.  And let's call a spade a spade -- it was totally the Splenda that did it.  The fruit was way too tart and the sugar I added wasn't in the original recipe; it was a last-ditch effort to safe the poor thing.  (Also, I'm told orange juice would have been a better choice than cranberry, but you can blame Ms. Winfrey's minions for that.)  Now, I'm pretty sure you all saw that coming and, honestly, I kind of did too.  But this is about experimenting!  Plus, wouldn't you rather leave me with the train wreck so you can learn from my fail?  That's what I thought.

Official Grade: C

Your Challenge: Nice and simple -- create a cranberry crisp that doesn't suck the big one.  And for those of you just itching to give me your Grandmammy's secret cobbler, crisp, crumble, or grunt recipe (hell, even a buckle or a pandowdy), send it my way and share the love.


Update: After digging in to the freezer for the remainder of this concoction, I realized I might have been a little too harsh the first time around.  It was more of a B- considering I ate all of it.

Tuesday, July 26, 2011

ITALIAN POPCORN + YOUR FIRST CHALLENGE


I wish I could tell you this went well.  I was really, really hoping.  Unfortunately, it fell quite flat.  But here's the positive, you can learn from my fail and maybe even figure out how to make this stellar.

INGREDIENTS:
1 100-calorie pack Orville Redenbacher popcorn
1/4 cup grated parmesan cheese
1/2 tsp dried oregano
1/2 tsp salt
1/4 tsp fresh ground black pepper

DIRECTIONS:
1. Pop popcorn in microwave according to directions on bag.
2. While popcorn is popping, mix the remaining ingredients.
3. Combine seasoning with freshly popped popcorn and shake to coat.  (Unfortunately the coating part works in theory but not in practice.  I blame food.com.)

FYI: When mixing popcorn with seasoning,
shake with vigor, not reckless abandon.
I don't like heavy butter on my popcorn, so maybe that's the problem.  When I go to the movie theatre and see that nasty yellow goo that people use to ruin this delicacy, I want to slap the box out of their hand and tell them not to defile my movie with it.  I like cheese popcorn, however (also fake, but go figure), so I thought this would be a nice, spiced up, lighter version of it.  The result: too light.  Even with olive oil added, the mixture doesn't stick to the popcorn and it's not that flavorful.  On top of that, it took plain ol' good popcorn and made me not want to eat it at all.  Super sad face.

Official Grade: F


YOUR CHALLENGE: Hook me up with a better seasoned popcorn recipe that'll bump a good bagged popcorn from decent to delicious.


WHAT THE HECK HAVE YOU BEEN EATING?!


It appears that people have been starting to wonder.  Has she fallen off the food wagon?  Has she been eating out all summer?  Is she gorging herself on Cheerios just to get by?  Weeeeell...there's a simple yet complicated set of answers: No, sort of, and no.  I've fallen behind because, well, life happens, so the next few posts will be me playing catch-up and then I'll fill you in on my summer shenanigans.

In the mean time, let me clue you in to a delicious upgrade to an old standard of mine.  I'm a fan of Lean Cuisine frozen pepperoni pizza, but after awhile it get's old, so I discovered a great way to liven that puppy up: The Great and Powerful Pepperoncini.


While the pizza alone ain't bad in itself, pepperoncini gives it a little pickley zing that wakes it up a bit.  Of course, fresh pizza is your best option, but if you're in a pinch, I definitely recommend.

Official Grade: A


Tuesday, June 21, 2011

A TALE OF TWO SAUCES


Being Italian, I really thought this dish was going to be a breeze.  I mean, seriously, how hard can pasta be for a girl who bleeds marinara?  What I didn't take into account was that the conglomeration of a few unconventional ingredients would throw me for a loop and the pasta-to-sauce ratio would nearly lead to my demise.  But have no fear, paisano!  I fixed that shit and I fixed it good.

Round 1: Red Sauce & Noodles
The question at hand: Can one make a pasta sauce with canned tomato soup?  Hmmm...well, Spaghetti-Os come pretty close, right?  I figured I'd give it a shot.  And at that moment, my great grandmother Angelina rolled over twice in her grave.


INGREDIENTS:
1 lb lasagna noodles
1 package frozen chopped spinach
1 can condensed tomato soup
1 can diced tomatoes
4 tbsp milk
2 cloves garlic, minced
1 tsp Italian seasoning
1/4 tsp chili powder
1/2 tsp black pepper
1/4 cup grated mozzarella cheese
2 tbsp butter
3 tbsp flour


DIRECTIONS:
Noodles
1. Boil lasagna noodles until tender.  Drain.  Stack in sets of 4-5 noodles and slice lengthwise into strips.  And watch your fingers!  (Yeah, you.)  Them noodles is hotsy totsy.


2. Microwave spinach until heated through.  Add to noodles and stir to combine.


Red Sauce
1. Melt butter in a large saute pan.  Add flour and mix until combined.
2. Add tomato soup, diced tomatoes, garlic, Italian seasoning, chili powder, and black pepper.  Simmer until sauce begins to thicken.


3. Add milk and cheese gradually and stir to mix in.


And huzzah!  A sauce!  And a pretty delicious one at that.  I didn't have spaghetti or linguini and I needed to save all my other noodles for other recipes.  Plus, I really though this would be a cinch and a good way to send the lasagna noodles to sleep with the fishes.  The problem is that these two don't exactly play well together.  Upon tasting, my reaction was a whole-hearted and resounding "Meh."

Behold!  My first attempt.  Looks delish, right?  Weeellll....
I thought maybe it wasn't saucy enough (I loooove sauce) but I needed to make sure I didn't use up all the sauce before the noodles.  The solution?  Add all the sauce (*gasp!*) to all the pasta.  Great grandma just rolled over again.  (In our family, sauce and pasta meet at the dish where there are chaperones.)  It just didn't work.

The positive end bit was that I realized the problem -- not enough sauce on a very, very starchy pasta makes for a very...ehhh...gluey experience.  But did I say FML and throw it out?  No!  I triumphed.  Defeat, I laugh in your ugly face!

Round 2: White Sauce
INGREDIENTS:
2 tbsp butter
2 tbsp flour
1 1/2 cups nonfat milk
1/2 cup grated mozzarella cheese
1/4 tsp salt
Fresh ground black pepper


DIRECTIONS:
1. Melt butter on medium-low heat in a small saucepan.
2. Add flour and stir until combined.


3. Add milk gradually and stir constantly until sauce thickens.
4. Add mozzarella gradually, stirring until all cheese is melted and mixed in.


5. Remove from heat and add salt (more if you like things saltier...).  You can add pepper to taste, but I prefer to add the pepper and a bit more salt to the dish when it's plated.

Booya!  Angela just made her first white sauce!  And an awesome one at that.  I'm not usually one to toot my own horn, but this sauce is bomb.  Straight up nuclear deliciousness.  And added to the pasta combo I'd made before, it stayed good.

Now, I have a sneaking suspicion the white sauce would be great on its own, but I think the mixture of white and red made a nice marriage of tomato and creaminess.  I'm definitely interested in trying this again, though, with just some bare naked pasta; I'm thinking linguini would work well.  I'm pretty proud that not only did my first attempt at white sauce do well, it was my very own recipe and was the result of trusting my instincts.


Round 1
Official Grade for Red Sauce: B+
Official Grade for Red Sauce with Sliced Lasagna Noodles: C-


Round 2
Official Grade for White Sauce: A
Official Grade for Total Combo (Red, White, & Pasta): A