Sunday, October 16, 2011

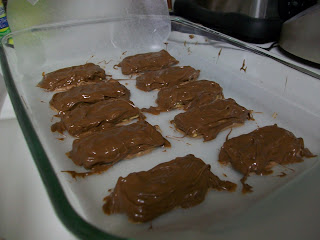
CHOCOLATE PEANUT BUTTER GRAHAMS


Hmmm...what to do, what to do.  Ya got four graham crackers left and what's your next move?  Well, I'm not one to just eat the dang things plain because this is an adventure.  I've got stuff to get rid of.  I'm not eating anything plain.  

My chocolate, having a seizure
So, before I begin, I'll tell you this one went awry, but let's make this a learning experience.  When you want to make your melted chocolate smoother, do not -- I REPEAT DO NOT -- add milk or water.  I had a perfectly good bowl of melted white chocolate, which I used half of, but I wanted it to drizzle, so I found out the hard way that adding even a tablespoon of milk will cause it to seize.   I even tried to add pieces of a chocolate bar to fix it.  No dice.

Seizing: a little internet enlightenment led me to this lovely word.  Before, I had no idea what it was. Seizing means that upon contact with water-based liquids, your chocolate will turn grainy and the moisture will separate out.  No more creamy.    How to avoid this?  Add oil instead. The short story: I started out with white chocolate chips and had to dip into my reserve chocolate stash to finish the job.


INGREDIENTS:
4 graham crackers
1/2 c. peanut butter
1/2 c. white chocolate chips
3/4 c. milk chocolate (chips, that is, but I had to use chocolate balls.  That's right.  Balls.)
1 tbsp. oil

DIRECTIONS:
1. Lay out waxed paper onto two baking sheets.

2. Carefully break graham crackers into fours.  I recommend using the heel of your hands -- not your fingers -- to avoid breaking them into small pieces.


3. Spread graham crackers with peanut butter.


4. Melt white chocolate chips in the microwave on a low or medium setting -- NOT HIGH (you will burn the shit out of your chocolate) -- and stir every 30 seconds or so.

5. Use a spoon to spread the chocolate onto the underside of each graham cracker.  (btw, this is where I f---ed up the chocolate because I wanted to drizzle the second half onto the top.)  Lay out on waxed paper.


6. Put trays into refrigerator or freezer to chill until chocolate is hard.

Step 6.5: Unwrap your balls.
7. Melt milk chocolate and mix in oil.  Use spoon to carefully spread chocolate over top and sides of graham, enclosing the graham and peanut butter completely.


7. Allow to cool and then eat voraciously.

I think this would probably be best with just milk chocolate, since the white chocolate made these a little on the sweeter side.  You could even try dark chocolate, but I think these really land best on middle ground.  What's great is they're small enough so as not to be overwhelming, but big enough to satisfy your sweet tooth.  I took these to work and they went like hot cakes.  One guy said they were really sweet and he couldn't eat the whole thing, but some people had two, so it all evens out.  And better yet, when offered the next day, people were asking for them, which means my coworkers weren't just saying they like them to be nice.

Official Grade: A

CHOCOLATE OATMEAL NO-BAKE COOKIES (TIMES 4)


There are a lot of things in this world we can't rely on: the weather, money, best friends who you think are your best friends but stab you in the back right smack in the middle of your impressionable teenage years...but I digress.  The only thing I've always been able to rely on is the arrival of my grandmother's yearly batch of Christmas cookies.  Bon bons, chocolate covered peanut butter ritz, oatmeal raisin, and my very VERY favorite -- chocolate oatmeal no-bakes.  Unfortunately, my grandmother is kind of...parsimonious when it comes to doling out the secrets of her recipes.

Grandma puts the cookies in coffee and oatmeal containers
rolled in wrapping paper and sends them to her kids' familes
every year.  She had 7 kids.  Damn, that's a lot of coffee and oatmeal.
Case in point, my father asked her for her sugar cookie recipe once and it took him years and many many batches to massage it into the actual recipe.  See, I suspect her strategy is to give out most of the recipe so it seems similar and then change some of it just to make not exactly hers.  Go ahead.  Say it.  "She's old.  She probably forgot."  or "Maybe she cooks by feel and doesn't know the exact measurements."  Bullshit.  She may not have been born an Ortner, but she was married to one, which means if it wasn't in her genes, she learned very well how to be sneaky.

Long story short: this isn't her recipe.  But lucky for me there are plenty of incarnations of it floatin' around on the wings of the interwebz and I found a good one -- and then made it better.  And what's more, I'm going to share it with all of you.


INGREDIENTS: 
1 c. white sugar
1 c. brown sugar
1/2 c. nonfat milk
1/2 c. margarine
4 tbsp. cocoa powder
2 1/2 c. oats
1/2 c. peanut butter
Variation 1: add 1 c. dried cranberries
Variation 2: add 1 c. chopped dates
Variation 3: add 1/2 c. pepitas (pumpkin seeds)

DIRECTIONS:
1. Lay out two sheets of waxed paper.
2. Melt margarine on low in a medium saucepan.  Add milk.


3. Combine white sugar, brown sugar, and cocoa powder and add mixture to saucepan.


4. Cook on medium low heat until the mixture comes to full rolling boil.
5. Cook at a boil for 1 minute.
6. Remove from heat and add peanut butter.  Mix well until blended.


7. Mix in oats.  For variations: Add cranberries, dates, or pepitas and mix well.
8. Drop onto waxed paper and let cool.  Voila!  Delicious!


To test out the different variations, I just divided the batch in four and added the equivalent.  If you'd like to make a multi-batch like I did, divide the mix after adding the oats and peanut butter.  One quarter stays plain. To the other quarters, add 1/4 c. cranberries, 1/4 c. dates, and 1/8 c. pumpkin seeds.  And not that I tried it, but I'm sure raisins or walnuts would be pretty good too.

The dates I had were a bit too dry for this, but I think that's just the particular dates I used.  Otherwise, this experiment went off without a hitch.  And I guarantee you, the cranberry ones will change your life.

Official Grade for Plain No-Bakes: A


Official Grade for Cranberry No-Bakes: A++


Official Grade for Pepita No-Bakes: A


Official Grade for Date No-Bakes: A-


Tuesday, October 11, 2011

HASTY PUDDING WITH GRAHAM CRACKER CRUMBS


That's right -- pudding.  I made homemade pudding.  No box.  No Cosby.  And I managed to make it without eggs, too.  Hearkening back to the good ol' days of yore, I rustled up the pre-Jell-O kind and made it all fancy-like with some smooshed up graham crackers.  Not bad for cabinet cuisine.

INGREDIENTS:
1/2 c. white sugar
1/3 c. unsweetened cocoa powder
3 tbsp. cornstarch
2 c. milk
11 graham crackers

DIRECTIONS:
1. Crush graham crackers by breaking into small pieces and givin' 'em a spin in a food processor.  Set aside.
2. Combine sugar, cocoa, and cornstarch.
3. Whisk in the milk, a little at a time so there are no lumps.
4. Pour into small saucepan and heat on low, stirring constantly until thickened.


5. Pour into baking dish.  Now you have two choices...


6a. Pour graham cracker crumbs over pudding.  Cover and chill in the refrigerator.  This is what I did, but it doesn't keep the grahams crispy.


6b. If you like your graham crunchy (which I recommend), cover pudding with plastic wrap to prevent a skin from forming and store graham cracker crumbs separately.  Top pudding with a few tablespoons of crumbs just before serving.

Bottom line: if you like dark chocolatey pudding, this is the one for you, but if you like your pudding a little sweeter, maybe try going easier on the cocoa powder.  1/3 cup is A LOT, considering many recipes call for a few tablespoons, so if I made this again I would half the amount and see what happened.  No matter what, it's pudding and it's simple.  Not as simple as pudding in a box, but it's the same consistency and with a little work on the cocoa, would probably taste just the same.  So if you don't have (read in a Cosby voice) "I luddell Julllo puddingg," then this'll do the job.

Official Grade: B
Potential with a Bit of Tweaking: A


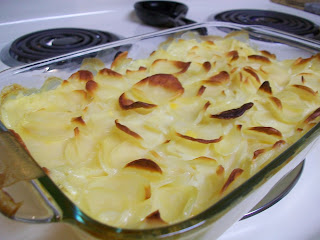
SIDE DISH SPECIAL: GARLIC POLENTA & POTATOES AU GRATIN


I'll make this one quick.  That Crockpot Barbeque Chicken I showed you really goes well with a little potatoey, polenta-y goodness and these are two easy side dishes that dress up plain ol' hunk o' meat.  Add a veggie and you're solid.

Oh, and by the by, the potatoes are an out-of-box special, but I don't make them exactly as the box calls for. The polenta started as an amalgamation of two recipes -- Easy Polenta with Tomato Sauce from allrecipes.com and Savory Polenta with Italian Shrimp from Culinaria-- pared down and tweaked from what I had on hand and is now something that doesn't really look like either.  Does that make it mine now?


GARLIC POLENTA INGREDIENTS:
1 c. cornmeal
2 1/4 c. milk
1 14oz. can chicken broth
1 1/4 tsp. salt
1 tsp. paprika
1 tsp. garlic powder

GARLIC POLENTA DIRECTIONS:
1. In a medium saucepan, combine milk and chicken broth and bring to a boil.
2. Slowly add cornmeal and stir.


3. Turn heat to low and simmer, stirring constantly, until thick.  OR you can do like I did and forget to turn the heat down and burn your damn finger with searing hot polenta popping out everywhere.

Sure, it's just a little burn over there on my ring finger,
but it's a war wound, nonetheless.
5. Stir in remaining ingredients and add salt to taste, if needed.  Boom.


POTATOES AU GRATIN INGREDIENTS:
1 box Betty Crocker Potatoes Au Gratin (with seasoning packet)
1 cup dried potato slices
1 1/4 c. boiling water
1/4 c. skim milk + enough to cover potatoes


POTATOES AU GRATIN DIRECTIONS:
1. Mix all ingredients together pour into a medium-sized glass baking dish.
2. Pour in enough milk to cover potatoes and cook, covered, according to directions on box.  I didn't cover mine.  See where that got me?  But if you want crunchy potato chips sticking out of your potatoes au gratin, knock yourself out and forget the foil, but you've been duly warned.


Official Grade for Garlic Polenta: A+
Official Grade for Potatoes Au Gratin: A-


CROCKPOT BARBECUE CHICKEN


Three words: Sweet.  Baby.  Ray's.  It all began when I saw it mentioned in a video on YouTube that my friend Chris shared with me (viewer discretion advised) and I bought it just for kicks and kind of as a joke.  But when I tried it...aw, yeaaah.  Before, I had thought all barbecue sauce tasted the same.  Post-Ray's, I know better.

Now I'm sad to say that the BBQ recipe I used it in originally went MIA and I had to make due with another I found.  Also, the chicken I used was frozen --for awhile--which is probably why it turned out a little dry and why I went for take two, which was boooomb.  So, below, I give you two incarnations of the same recipe for whatever form of chickie you'd like to use.


INGREDIENTS:
40 oz. frozen boneless skinless chicken breast tenders (or 4-6 fresh boneless, skinless chicken breasts)
1 bottle Sweet Baby Ray's Barbecue Sauce
1/4 c. vinegar
1 tsp. red pepper flakes
1/4 c. brown sugar
1/2 tsp. garlic powder

DIRECTIONS:
1. Mix together all ingredients except chicken.


2. Pour sauce mix over chicken and toss to coat (if using frozen chicken, no need to defrost it; just pop it in there.)


3. Empty chicken and sauce into crockpot and cook on low for 4-6 hours.


Sadly, my chicken ended up really dry and all I could think was "What a waste of great sauce!"  because it didn't really stick to the chicken.  My solution (which, by the way, worked like a dream):
4. Use two forks to shred the chicken and allow it to sit in the sauce for 10 minutes.


Crisis averted.  I was so sad things didn't work out on the first try but was happy as a pig in a poke when I found out that not only had I fixed my flub, but had made it A-worthy.  For those of you who thought you would never use math or science past the 12th grade, here's the skinny: shredding equals more surface area which equals more area for the chickee-doos to soak up all the goodness.

And since I needed something to go with it (shredded chicken looks so sad all alone), I conjured up some side dishes, which you'll see soon.  Done and done.

Official Grade Before Shredding: B-
Official Grade After Shredding: A